- 26 Jul 2025
- Gideon Thornton
- 0
Heard about horror stories where a family wakes up to a freezing shower, and the culprit turns out to be nothing more sinister than a water heater choked with muck? That’s not some rare nightmare. Every year, thousands in the UK and worldwide shell out money for water heater repairs, or worse, complete replacements—all because routine maintenance gets brushed off. The big question: when you peek at your tank and think it’s time for a bit of TLC, is it better to flush the system or just drain it? While they sound similar, these two approaches play different roles in keeping that hot water flowing without hassle.
What’s the Difference Between Flushing and Draining?
Most folks don’t realise there’s a difference between draining and flushing your water heater. The two terms get tossed around, but the details matter—a lot. Flush water heater searches spike every winter, as people panic after their water runs icy or the tank rumbles like a steam train. Draining just lets the water out. Flushing, on the other hand, actually pushes remaining sediment out with fresh water. Imagine draining is like emptying a muddy bucket, while flushing is rinsing it out so not even a stubborn clod remains.
A standard drain means turning off power (for safety—nobody wants a burnt-out element), shutting the cold-water valve, and opening the tank at the bottom to let gravity do its thing. Sediment, however, has a knack for settling and sticking to the bottom. If you only drain, you’ll leave behind a gritty layer that bakes onto your element or tank, making everything work harder. The real fix? Flushing forces clean water through the entire system—giving the tank a full sweep-out. Think of it like swishing water through a thermos: draining tips it over, but flushing actually cleans the walls.
Some experts in Bristol, where limescale is a common headache due to hard water, say you need both steps. That’s why water heater manufacturers—like Rheem, Bosch, and Worcester Bosch—recommend an annual or even twice-yearly flush for tank models. It’s not just for the obsessively tidy; it’s for anyone who likes hot water that doesn’t cost a fortune in wasted electricity or gas.
Why Sediment Build-up Wrecks Your Water Heater
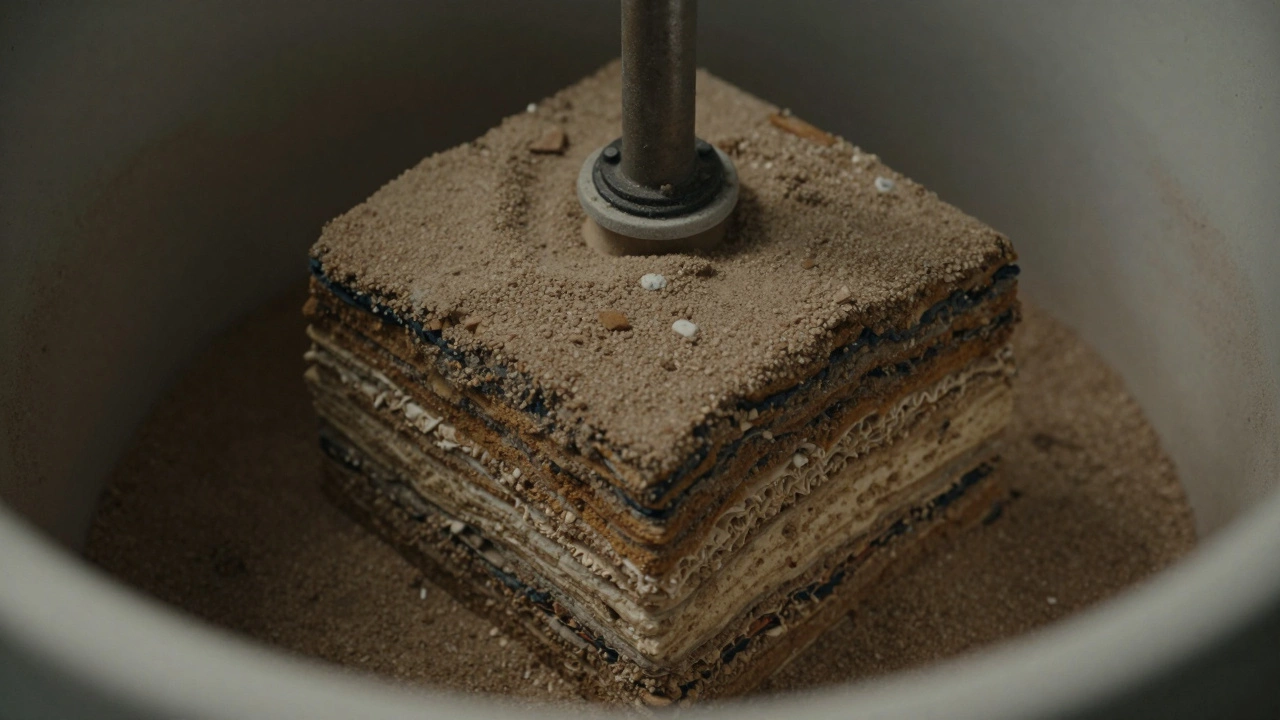
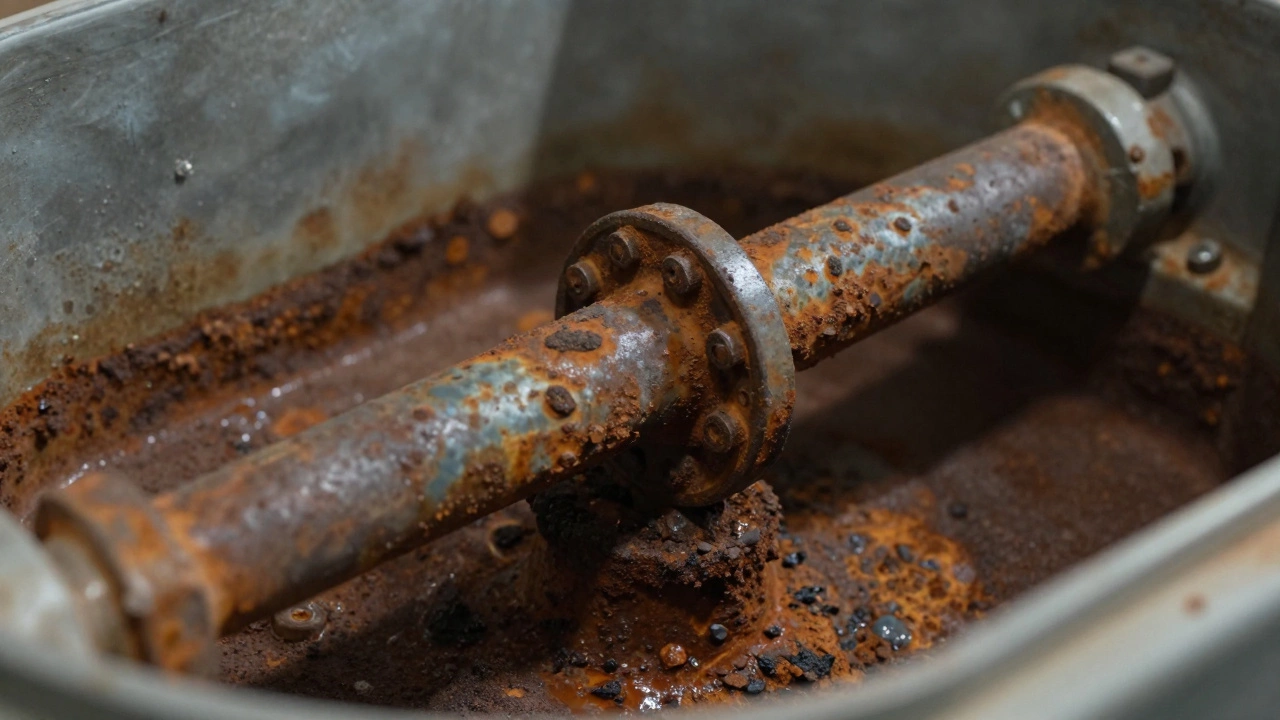
You’d be surprised at what hides inside the average water heater. Sediment, mostly made up of minerals like calcium, magnesium, sand, and rust, creeps in from your mains water supply. It’s not a UK-only problem—US studies show hard water can leave up to 4kg of sediment in a 150-litre tank in just a couple of years. In Bristol, if your water comes from the Mendip Hills, you’re drinking a cocktail of minerals known for calcifying pipes and elements. Sediment is a silent destroyer: it insulates heating elements, strains the thermostat, clogs the drain valve, and even makes your tank groan and pop as bubbles escape the hard-reaching heat.
Left unchecked, sediment leads to a few headaches:
- Reduced tank efficiency—heating time stretches, and energy bills go up.
- Shortened heater lifespan—a tank that should last 10-15 years might conk out in seven.
- Risk of leaks or even burst tanks—because corrosive sediment eats away at the steel lining.
- Noisy operation—rumbling and popping can spook even the most stoic homeowner.
Here’s a quick look at real numbers, based on 2023 UK homeowner reports and manufacturer data:
| Issue | Caused By Sediment | Percentage of Heater Failures Linked* |
|---|---|---|
| Increased Bill/Reduced Efficiency | Yes | 60% |
| Water Heater Leaks | Often | 45% |
| Noisy Operation | Yes | 80% |
| Heating Element Failure | Directly | 50% |
*Based on a survey of 3,000 UK water heater repairs in 2023
So if your storage tank hasn’t had a thorough flush in years, you’re letting the enemy make itself at home.

When to Flush vs When to Drain: How to Decide
If you’re only looking to empty the tank—say, for a move, repairs, or to replace the unit—draining is enough. It’s quick, simple, and leaves the bulk of the tank empty. But if maintenance and performance are the goal, draining by itself is like dusting around the clutter. Flushing, with a sharp blast of cold water through the tank, is the move for banishing sediment.
You don’t need a plumber’s toolkit to spot when flushing is overdue. Listen for weird noises—popping, gurgling, or knocks suggest trapped bubbles under a sediment layer. Lukewarm or inconsistent water temperatures are another sign. If draining the tank and the water is cloudy, rusty, or bursts out with bits of gravel, it’s time for a full flush. If your heater is new (less than a year old), or if you live in a soft-water area, you might only need draining once a year—the rest of us should flush at least annually.
Check your user manual—models like the Worcester Bosch Greenstar or the Ariston Andris recommend annual flushing and expect it as part of the warranty conditions. Ignoring this makes for a grumpy customer service call when something does go wrong.
Flushing works for both electric and gas storage tanks. Tankless/on-demand heaters are another ball game—they need a vinegar descaling system, not a standard flush. So always know what setup you have before you start.
How to Flush or Drain Your Water Heater: Easy Step-by-Step Guide
No need to call for backup—anyone can tackle this with a bit of patience and the right plan. Here’s how you get it done safely, without a mess or scalded fingers.
- Turn off the power. For electric heaters, switch off the breaker. Gas models need the thermostat set to ‘pilot’.
- Shut off the cold water supply valve at the top of the tank.
- Let the tank cool for a couple of hours to avoid burns. Test the water by opening the hot tap briefly.
- Attach a hose to the drain valve at the bottom of the tank. Lead the other end to a suitable drain—preferably outside if possible.
- Open a hot tap in the house (upstairs taps work well) to relieve pressure and let air in as you drain.
- Open the drain valve and let the water flow out. If draining is your only aim, let it run until the tank’s empty, then close the valves and refill.
- For a flush: Once the tank is nearly empty, turn the cold supply back on briefly. The sudden flow stirs up sediment and washes it out. Do this a few times until water runs clear from the drain hose.
- Close the drain valve. Take care—old valves can leak if over-tightened.
- Open the cold supply fully, let the tank refill, and watch for leaks. Keep the hot tap open (still upstairs) so air purges from the system.
- Restore power or reset the gas thermostat.
Never skip the cooling-down step—scalds from boiling water are no joke, and neither is an electric shock from a heater turned back on with a dry element. Clean-up tip: pop a towel under the valve to catch the odd drip. Don’t forget to check the relief valve for leaks after a flush—it can get jammed with debris too, and you don’t want your first sign of trouble to be water on the floor.
For those in harder-water areas, buy a valve-cleaning tool or even a wet/dry shop vacuum to suck out stubborn chunks through the open drain. If you’re constantly getting brown muck or the water never clears, call a professional—your anode rod or tank lining may be past its best.
Want to make life easier next year? Stick a reminder on your calendar for a spring or autumn flush, just as you’d bleed your radiators for winter.