- 14 Jun 2025
- Gideon Thornton
- 0
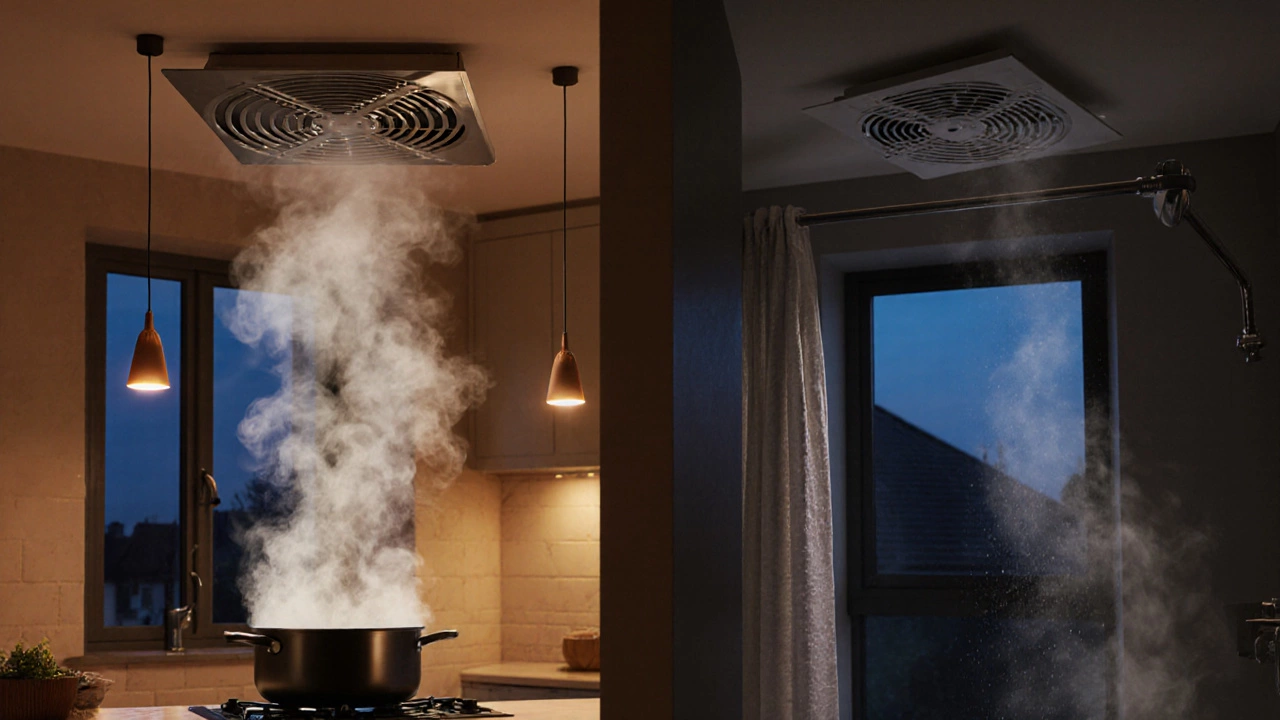
Trying to decide if you should swap out your extractor fan yourself? You’re not the only one sizing things up in front of a noisy bathroom fan or a kitchen vent caked with grease. Here’s the truth: most extractor fans are designed to be swapped out without tearing your whole wall or ceiling apart. If you can handle a screwdriver and follow some safety basics, you’re already ahead of the game.
A big surprise for most people: the hardest part isn’t pulling out the old fan. Usually, it’s tracking down the right replacement that matches your existing wiring and duct size. Get that wrong, and the job quickly turns into a headache. Oh, and don’t forget to flip the breaker—nobody wants a shock when grabbing metal fan parts.
Before you even touch the fan, take a quick photo of the wiring. You’ll thank yourself when it's time to hook up the new one. Most fans use simple wiring—just a live wire, neutral, and maybe an earth—but double-check, because sometimes older homes throw a curveball.
- Should You DIY or Call a Pro?
- The Tools and Prep Work
- Step-by-Step Replacement Guide
- Common Problems and How to Dodge Them
Should You DIY or Call a Pro?
The first thing to ask: do you really need a professional to handle this, or is replacing your extractor fan a solid DIY job? Here’s a reality check—if your current fan is wired the standard way and connects to a regular duct, most people with some basic home repair skills can handle the swap, no expensive tools needed.
Diving deeper, take stock of your comfort level with anything electrical. If fiddling with household wiring freaks you out, calling a pro is a smart move. But if you’ve ever changed a light fixture or dealt with a wall switch, you’ve pretty much got the skills required. The real danger comes with older houses: weird wiring, maybe a lack of proper grounding, and sometimes, brittle insulation that crumbles in your hands. That’s when even the bravest DIY fans bring in help.
"You don’t need to be an electrician to swap a bathroom fan, but you do need to be honest with yourself about your limits. If you’re not comfortable turning off circuits or handling wires, hire someone who is."
— Mike Holmes, Contractor & TV Host
On the money front, you could save $100 to $200 or more doing the job yourself. Pros sometimes charge a flat rate, but things climb fast if there’s ductwork or tricky access. Here’s how the time and cost might stack up:
| Option | Typical Cost | Time Needed | Risk Level |
|---|---|---|---|
| DIY Replacement | $50 (fan only) | 1-2 hours | Low to Medium |
| Pro Installer | $150-$300 | 1 hour | Very Low |
So, do-it-yourself is cheaper and not much slower, as long as nothing goes sideways. But don’t risk it with odd voltage setups or if you spot damaged wiring—seriously, call someone in. No savings is worth chancing a fire hazard or a shock.
Quick tip: if your fan connects to an outside vent, check exterior access. High-up vents or blocked ducts can make what looks like a simple job a sweaty, unsafe mess—better left to the pros if you’re climbing ladders outdoors or punching through brick.
- If you’re confident with basic wiring, DIY is usually fine.
- Unsure, or have outdated electrical? Go pro.
- Awkward locations—tight lofts, roof vents—almost always scream for a professional install.
The Tools and Prep Work
Getting ready is half the job. A little planning saves a lot of swearing later, trust me. Before you even open up that extractor fan, make sure you’ve got the right gear and know what you’re dealing with.
Here’s what you’ll need for most replacements:
- Flat-head and Phillips screwdrivers
- Wire strippers/cutters
- Voltage tester (to make doubly sure the power is off)
- Drill (if you need to widen the mounting holes)
- Duct tape or foil tape for sealing up air leaks
- Pencil for marking positions
- Replacement fan (double-check size and wiring type!)
- Ladder or sturdy step-stool
- Protective gloves and safety glasses
Don't skip that voltage tester. According to the Electrical Safety Foundation International, about 30,000 shock incidents happen every year in homes across the US, most during small jobs that "seemed safe." Better safe than sorry.
"Unintended injuries from fans and small electrical appliances are common in home renovations. Checking power and using proper tools can cut accidents by up to 70%." — National Safety Council, 2024
Give everything a quick wipe-down before you work. Old fans are usually loaded with dust, and you don’t want it raining down into your eyes or lungs. Plus, you’ll be able to spot any cracks, leaks, or wiring issues you might miss under all that gunk.
Now, about matching up your new fan: you’ll want to know your current fan’s size (diameter of the duct and the unit itself), the mounting system (some screw in, others use spring clips), and whether it’s wired to a wall switch, timer, or humidity sensor. Getting the wrong type means more trips to the hardware store—or worse, a fan that doesn’t fit.
| Fan Type | Typical Duct Size (inches) | Recommended Tools |
|---|---|---|
| Bathroom Extractor | 4"-6" | Screwdriver, wire stripper, voltage tester |
| Kitchen Hood Fan | 6"-8" | Screwdriver, drill, duct tape |
| Inline Duct Fan | 4"-10" | Drill, tape, wire stripper |
One quick tip: snap a photo of the existing wiring before you touch anything. Phones exist for a reason, and you won’t remember which wire goes where after the fan is off the wall. If the job looks complicated—think old aluminum wiring, weird timers, or crumbly drywall—don’t be a hero. Nothing wrong with calling an expert when things get dicey.
Step-by-Step Replacement Guide
Ready to swap an extractor fan? The whole job usually takes about 30 to 60 minutes, depending on how accessible everything is. Here’s a step-by-step guide based on real-world installs and my own embarrassing mistakes along the way.
First things first—turn off the power at the breaker. You’d be shocked (literally) how many people forget this bit. If your fan has a separate fuse or isolation switch, double down and flip that too.
- Remove the cover: Most fans have a plastic grille held in place by two screws or just clipped on. Pop that off and set it aside. Sometimes there’s a layer of dust and grime—just brush it away so you don’t end up wearing it later.
- Unscrew the old fan: The body is usually fixed with two or more screws. Keep track of these—nothing stalls a job faster than crawling around for missing hardware.
- Disconnect the wiring: Take a clear photo before unplugging anything. Loosen the terminal block screws and gently pull the wires free.
- Check the duct and fit: While everything’s open, peek at the duct. If it’s crumbling or blocked, now’s the only easy time to fix it. Line up your new fan—if the screw holes don’t match, you may need to drill new ones.
- Connect the new fan: Match the wires to where they were before: live to live, neutral to neutral, earth if it has one. Tighten the terminal block. No loose wires allowed.
- Secure the new fan and cover: Screw the new fan unit into place. Don’t overtighten—plastic can crack. Snap or screw on the new grille.
- Flip the power back on and test: Turn the breaker or switch back on. The fan should kick in right away or whenever the light switch is flipped if it’s wired that way.
As the guys at Homebuilding & Renovating magazine put it,
"Extractor fan swap-outs are often less about technical know-how and more about remembering the small details—like proper isolation and wire order."That pretty much sums up the job. Mistakes happen when you rush or skip double-checks, so go steady and be methodical.
If the new fan hums along and pulls steam out, you nailed it. If not, unplug and check connections—nine times out of ten, it’s a wire in the wrong slot or a tripped breaker.
Common Problems and How to Dodge Them
Even folks who nail the basic steps can run into some classic hiccups when replacing an extractor fan. Here are the most typical problems and how you can sidestep them:
- Extractor fan doesn't fit: Seriously, grabbing a fan that's even half an inch too big can turn a quick job into drywall surgery. Always measure the opening before you buy, and double-check if your duct is round or rectangular. If you’re not sure, bring the old fan to the shop or snap a photo of the label.
- Noisy operation after install: If your new fan rattles or buzzes, it’s usually not installed flush against the wall or ceiling. Sometimes loose screws or an uneven mounting surface are the culprits. Tighten everything down and make sure there’s no extra wiggle room.
- Weak airflow: A shocking number of fans underperform just because the vent duct is blocked with dust or cobwebs. Before popping in the new unit, clear out the duct. Fans also can struggle because of an air leak between the fan and the duct—seal with tape to fix it.
- Wiring headaches: Color-coded wires help, but older houses sometimes use irregular schemes. Don’t just guess—if you’re stuck, use your phone photo for reference. If anything looks burnt or brittle, swap out that old wiring for safety.
- Mains power left on: Each year, people end up in the ER because they forgot to flip the breaker. No fan project is worth a zap, so always double-check with a tester or plug something else in to make sure it’s really off.
Here's a quick look at which issues trip up DIYers the most, based on a 2024 UK home repairs survey:
| Problem | % of DIYers Affected |
|---|---|
| Fan doesn’t fit | 38% |
| Noisy after install | 21% |
| Weak airflow | 17% |
| Wiring mix-ups | 15% |
| Forgot to turn power off | 9% |
If you hit a snag and have to walk away for a day, just cover the opening with tape or foil to keep critters or bugs from popping in. And honestly, there’s no shame in asking for help if your wiring is confusing or the fan just refuses to fit. Sometimes calling an electrician is the fastest way to save your Saturday.