- 19 Feb 2026
- Gideon Thornton
- 0
Extractor Fan Maintenance Calculator
How often should you clean your extractor fan?
Calculate your personalized maintenance schedule based on room type and usage frequency
Recommended Maintenance Schedule
Airflow Requirements
Important: This calculator assumes your fan is properly installed with unobstructed ductwork. For best results, also clean the ductwork annually.
Extractor fans don’t just disappear when they stop working-they get louder, smellier, and more stubborn. If your kitchen or bathroom fan is making a grinding noise, isn’t pulling air out, or leaves a foggy haze after a shower, it’s not broken. It’s just dirty. Most extractor fan failures aren’t caused by electrical faults or motor burnout. They’re caused by grease, dust, and years of neglect. Servicing one takes less than an hour and costs nothing but your time. Here’s how to do it right.
Turn Off the Power First
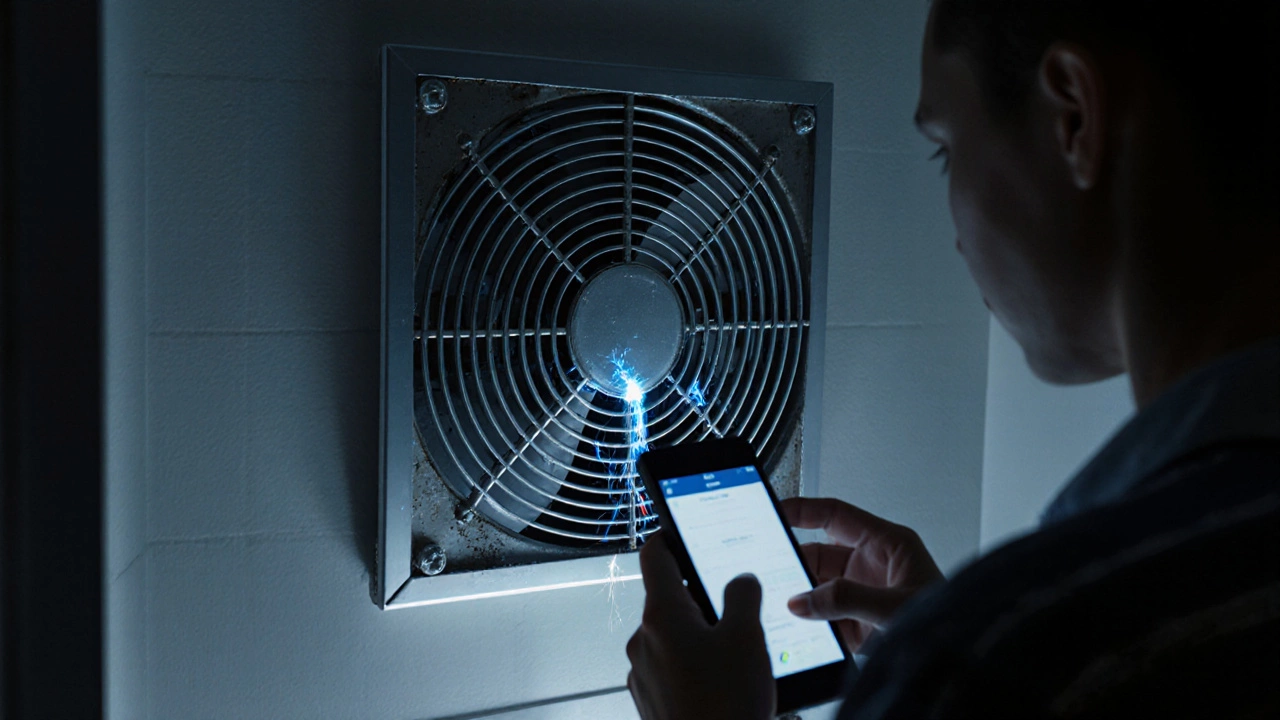
Before you touch anything, kill the power. Not just the switch on the wall. Go to your circuit breaker and turn off the circuit that powers the fan. Some extractor fans are wired directly into the house circuit, not plugged in. If you’re unsure, use a non-contact voltage tester near the switch or fan housing. It’s not worth risking a shock over a smelly fan.
Remove the Cover or Grille
Most extractor fans have a removable cover. Some snap off with a gentle tug. Others use screws-usually hidden under a rubber seal or behind a decorative trim. Use a flathead screwdriver to pry off seals carefully. Keep track of screws. Put them in a small container or tape them to a piece of paper labeled with the fan’s location. Losing a screw means you’ll either jury-rig a fix or buy a whole new unit.
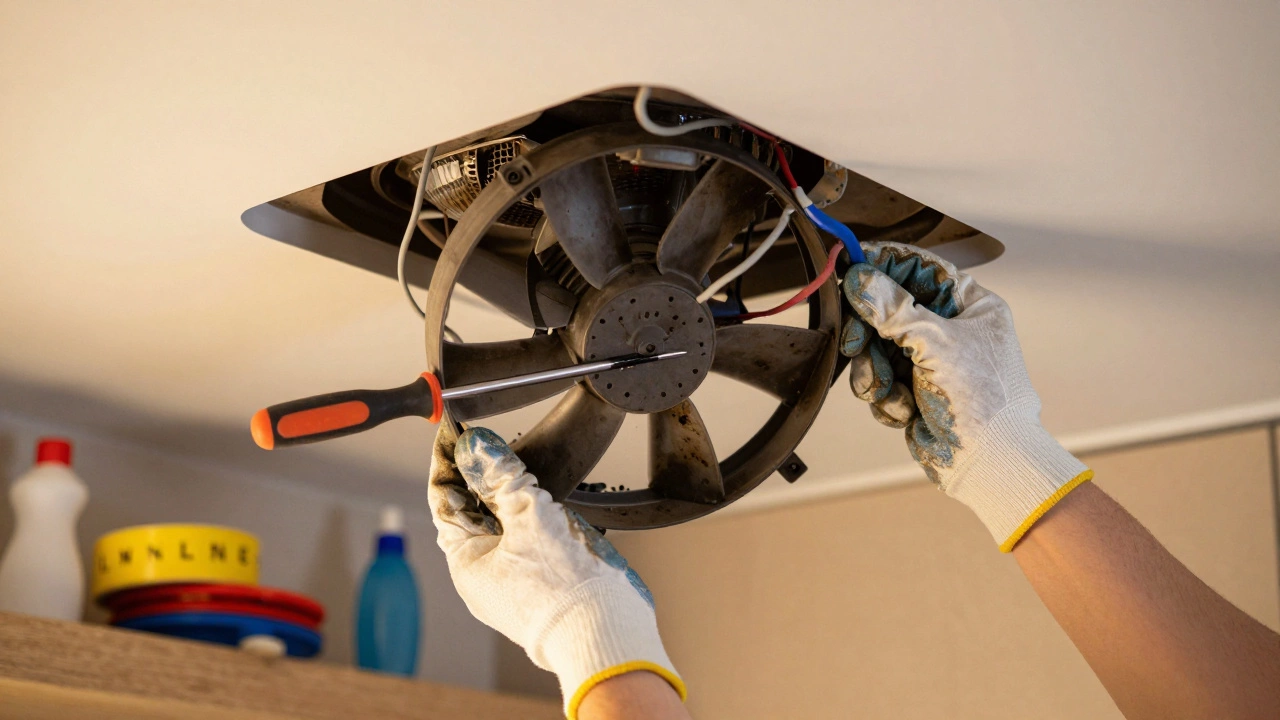
Take Out the Fan Unit
Once the cover is off, you’ll see the fan assembly. It’s usually held in place by two or three screws on the sides or back. Unscrew those, then gently pull the unit out. Don’t yank it. The wires are still connected. If you see a plug, unplug it. If it’s wired directly, take a photo of the wire connections before disconnecting. Label the wires with masking tape: Live (L), Neutral (N), Earth (E). This saves you from guessing later.
Clean the Blades and Housing
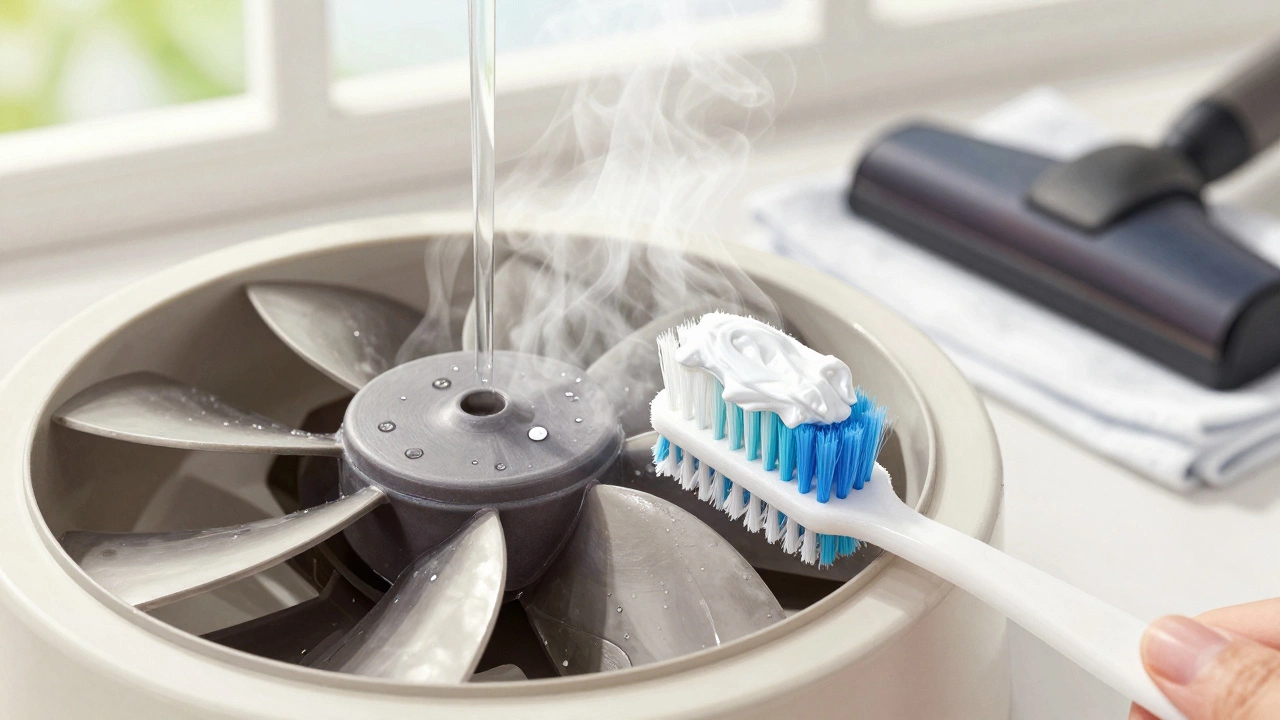
Grease builds up on fan blades like a layer of sticky tar. Use hot water, dish soap, and an old toothbrush. Scrub each blade thoroughly. Don’t use steel wool or abrasive pads-they scratch the plastic or metal. For stubborn grease, mix baking soda and water into a paste. Let it sit for 10 minutes, then scrub. Rinse with clean water and let everything air-dry completely. Moisture left inside the motor housing causes rust and short circuits.
While the blades dry, wipe down the inside of the housing with a damp cloth. Use a vacuum with a brush attachment to suck out dust from corners and crevices. Pay special attention to the motor housing. Dust here insulates the motor, making it overheat. Overheating kills motors faster than anything else.
Check the Bearings and Motor
Spin the fan blades by hand. They should turn smoothly with no grinding, wobbling, or resistance. If they feel gritty or stick at one point, the bearings are worn. You can’t replace bearings on most residential extractor fans-they’re sealed units. If the motor feels rough, it’s time to replace the whole unit. A $50 fan is cheaper than a callout fee.
Smell the motor. If it smells like burnt plastic or ozone, the windings are failing. That’s not fixable. No amount of cleaning will bring it back. Replace it.
Reinstall the Fan Unit
Once everything is dry, put the fan back in. Reconnect the wires exactly as you photographed them. Double-check: Live to Live, Neutral to Neutral, Earth to Earth. Tighten the mounting screws. Don’t overtighten-they can crack plastic housings. Replace the cover or grille. Snap or screw it back into place.
Test It
Turn the power back on. Flip the switch. The fan should start quietly and pull air immediately. If it hums but doesn’t spin, the capacitor might be dead. That’s rare in modern fans. If it’s noisy, the blades might be unbalanced. Recheck their alignment. If it’s still sluggish, there’s likely a blockage in the duct.
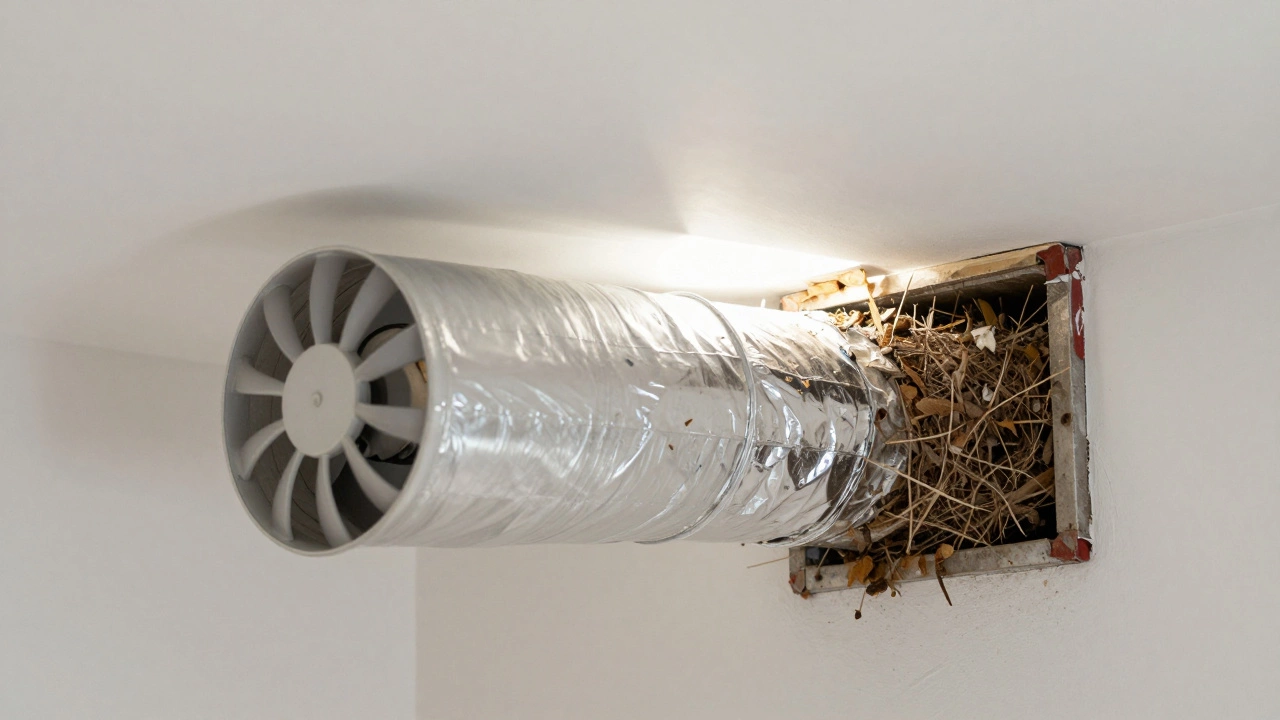
Check the Ductwork
Extractor fans don’t work in a vacuum. They push air through a duct that leads outside. If that duct is kinked, crushed, or full of bird nests, the fan will strain. Go to your attic, roof space, or exterior wall and inspect the vent pipe. Look for debris, droppings, or collapsed sections. Clean it with a flexible brush or a vacuum hose. Seal any gaps with aluminum foil tape-not duct tape. Duct tape dries out and falls off in months.
How Often Should You Service It?
For kitchens: every 6 months. Grease builds up fast. If you fry food daily, clean it every 3 months. For bathrooms: once a year. Moisture and hair clog filters faster than you think. If you live in a humid climate or near the coast, clean it more often. Salt air corrodes metal parts.
Signs You Need a New Fan
- It takes 10 seconds to start
- It makes grinding, screeching, or rattling noises
- It smells like burning when running
- It’s over 10 years old
- It doesn’t move air even after cleaning
Modern extractor fans are quiet, energy-efficient, and come with timers or humidity sensors. A $70 fan with a 10-year warranty is better than a $200 repair job on a 15-year-old model.
What Not to Do
- Don’t spray aerosol cleaners into the motor. They leave residue that attracts more dust.
- Don’t run the fan while cleaning. Even if the power’s off, a slip can turn the blades and damage the motor.
- Don’t use bleach on plastic. It yellows and weakens it over time.
- Don’t ignore the duct. A clean fan with a blocked duct is still useless.
Final Tip: Install a Filter
Most extractor fans have a removable grease filter. If yours doesn’t, buy one. A washable aluminum mesh filter costs under $15. Clean it monthly in the dishwasher or with hot soapy water. It catches 80% of grease before it reaches the motor. It’s the easiest upgrade you’ll ever make.
Can I clean my extractor fan without removing it?
You can wipe the grille and vacuum around the edges, but you won’t reach the grease inside the fan blades or motor housing. Deep cleaning requires removing the unit. Surface cleaning only delays the problem-it doesn’t fix it.
Why does my extractor fan smell bad even after cleaning?
The smell usually comes from trapped grease in the ductwork or mold growing in damp areas. Clean the duct from both ends. If the duct runs through a cold attic, condensation can build up. Install a moisture-resistant duct or insulate it. Also, check for leaks where the duct connects to the fan-water gets trapped there.
Is it safe to use a vacuum cleaner on the fan blades?
Yes, but only if the power is off and the blades can’t spin. Use the brush attachment on low suction. High suction can damage the blades or pull wires loose. Never let the vacuum nozzle touch the motor windings.
How do I know if my extractor fan is powerful enough?
Check the CFM (cubic feet per minute) rating on the fan or its manual. For kitchens, you need at least 100 CFM. For bathrooms under 50 square feet, 50 CFM is enough. Multiply the room’s volume by 8 to get the minimum airflow needed. A 6x8x8-foot bathroom needs at least 3,072 cubic feet per hour, which equals about 51 CFM.
Can I replace my extractor fan myself?
Yes, if you’re comfortable with basic wiring. Turn off the power, disconnect the old unit, match the wires, mount the new one, and test it. Most modern fans come with quick-connect plugs. If you’re unsure about the wiring, hire an electrician. A $100 service call is cheaper than a fire.