- 18 Jun 2026
- Gideon Thornton
- 0
Extractor Fan DIY Suitability Checker
Your Situation
Safety & Requirements Checklist
Check off the items you have confirmed or possess.
There is nothing quite as annoying as a foggy bathroom mirror or a kitchen that smells like last night’s curry for three days straight. You look at the ceiling, spot the hole where the old fan used to be, and think: “I can fix this myself.” It sounds simple enough. Buy a new unit, screw it in, plug it in. But before you grab your drill, there are some serious questions about safety, legality, and whether you actually have the right tools for the job.
The short answer is yes, you can install an extractor fan yourself, but it depends heavily on where you live, what kind of fan it is, and how confident you are with electrical wiring. In the United Kingdom, the rules around electrical work and building regulations are strict for good reason. Get it wrong, and you risk not just a faulty appliance, but fire hazards or failing a home inspection when you sell your house.
Quick Summary: Can I Do This?
- Yes, if: You are replacing an existing fan in the same location and are comfortable with basic electrics.
- No, if: You are creating a new external ducting run through brickwork or installing in a high-risk area (like near a bath) without proper IP ratings.
- Check Regulations: In England and Wales, Part F of the Building Regulations requires adequate ventilation. New installations often need approval.
- Safety First: Always turn off power at the consumer unit (fuse box) before touching any wires.
Understanding the Risks: Why Ventilation Matters More Than You Think
We often treat extractor fans as optional gadgets until they break. But in reality, they are critical health and safety devices. Poor ventilation leads to condensation, which breeds black mould. Mould isn’t just ugly; it causes respiratory issues, allergies, and can damage the structural integrity of your walls by rotting timber frames.
In the UK, Building Regulations Part F sets the legal standards for ventilation in homes. If you are buying a new property or selling one, inspectors will check these systems. If you install a fan incorrectly, you might violate these regulations. For example, simply plugging in a portable fan doesn’t count. The air needs to be extracted directly to the outside via a duct. If you cut corners here, you’re trapping moisture inside the wall cavity, which is a recipe for disaster.
Also, consider the noise. Cheap DIY fans can sound like a jet engine taking off. A properly installed, higher-quality unit uses acoustic dampening and balanced motors to keep decibel levels low. If you install it poorly, vibrations can travel through the ceiling joists, making the noise worse.
When Should You Call a Professional?
Not every job is a DIY project. Here is a quick checklist to decide if you should hire an electrician or a specialist installer.
- New Ducting Required: If you are drilling through an external brick wall to create a new exit point for the air, this involves masonry work and potentially complex sealing against weather. This is best left to pros.
- Electrical Uncertainty: If you don’t know how to identify live, neutral, and earth wires, or how to use a multimeter to confirm the power is off, stop. Electricity kills. Hire someone.
- Complex Wiring: Some fans require hardwiring into the main circuit, especially if they include heat sensors or humidity timers that need constant power. If the existing setup has no live wire nearby, you’ll need to run new cables.
- Warranty Concerns: Many manufacturers void their warranty if the installation isn’t done by a certified professional. Check the manual first.
- Height Issues: If the fan is high up on a sloped roof or difficult-to-reach ceiling, working on a ladder while handling heavy machinery and sharp screws is risky.
If none of these apply to you, and you are simply swapping out an old, broken unit for a new one in the exact same spot, you might be safe to proceed.
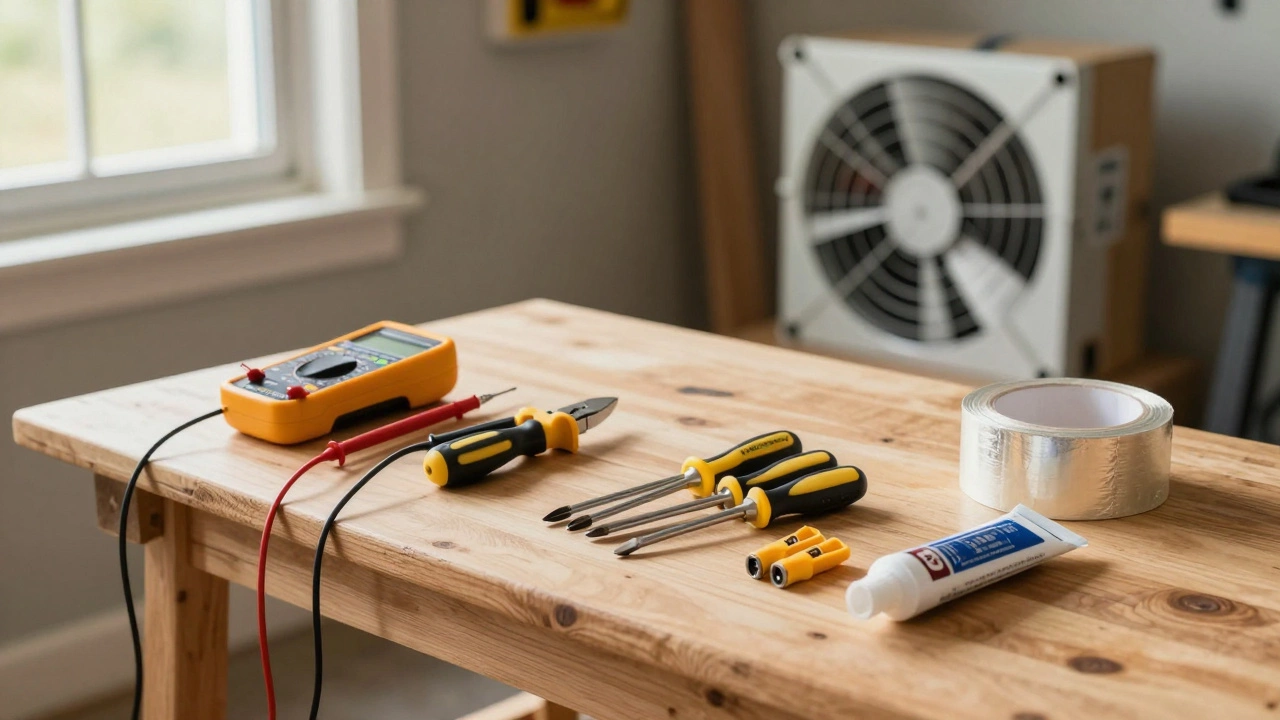
Tools and Materials You Will Need
Before you buy the fan, gather your gear. Trying to install a fan with a butter knife and hope is not a strategy.
- Multimeter: Essential for checking that the power is truly off. Never trust the switch alone.
- Screwdrivers: Both flathead and Phillips head. A magnetic tip helps hold screws in place when you’re reaching up.
- Drill and Bits: For mounting brackets and possibly enlarging holes if the new fan is slightly larger.
- Pliers and Wire Strippers: To connect the wires securely.
- Cable Connectors (Wago Levers): These are much safer and easier than twisting wires and wrapping them in tape. They ensure a solid connection without exposed copper.
- Sealant: Silicone sealant to prevent drafts and water ingress around the external vent.
- Duct Tape (Aluminium Foil Tape): Standard plastic duct tape fails quickly. Use foil tape to seal joints in the flexible ducting.
- Ladder: Sturdy and stable. Have someone hold it if possible.
Step-by-Step Installation Guide
If you’ve decided to go ahead, follow these steps carefully. Rushing leads to mistakes.
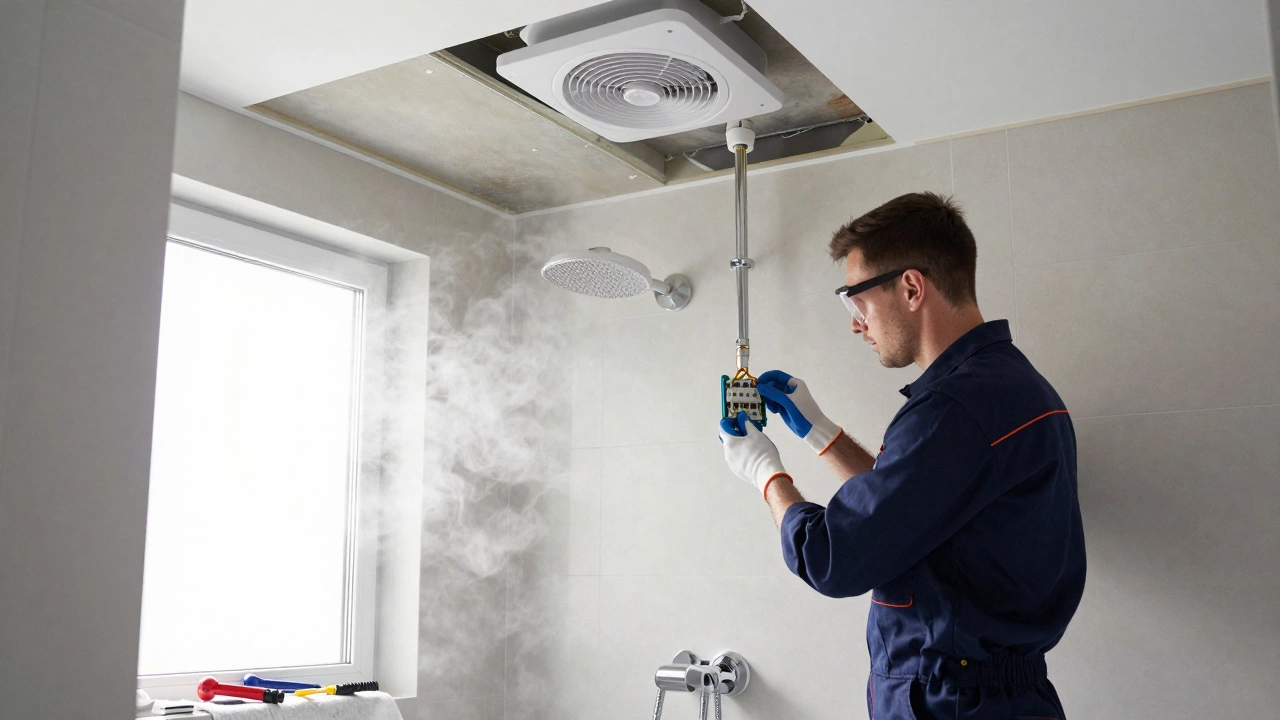
- Turn Off the Power: Go to your consumer unit (fuse box) and switch off the breaker for the room where you are working. Use your multimeter to test the wires in the ceiling rose or junction box. If the meter beeps or shows voltage, turn off the main switch immediately and call an electrician.
- Remove the Old Fan: Unscrew the faceplate or grille. Carefully disconnect the wires. Note how they were connected (take a photo with your phone!). Remove the mounting bracket or the fan housing itself.
- Inspect the Space: Check the hole in the ceiling. Is it clean? Are there signs of water damage or mould? Clean it out. Ensure the ducting behind the wall is clear of bird nests or debris. Birds love nesting in warm, dark vents.
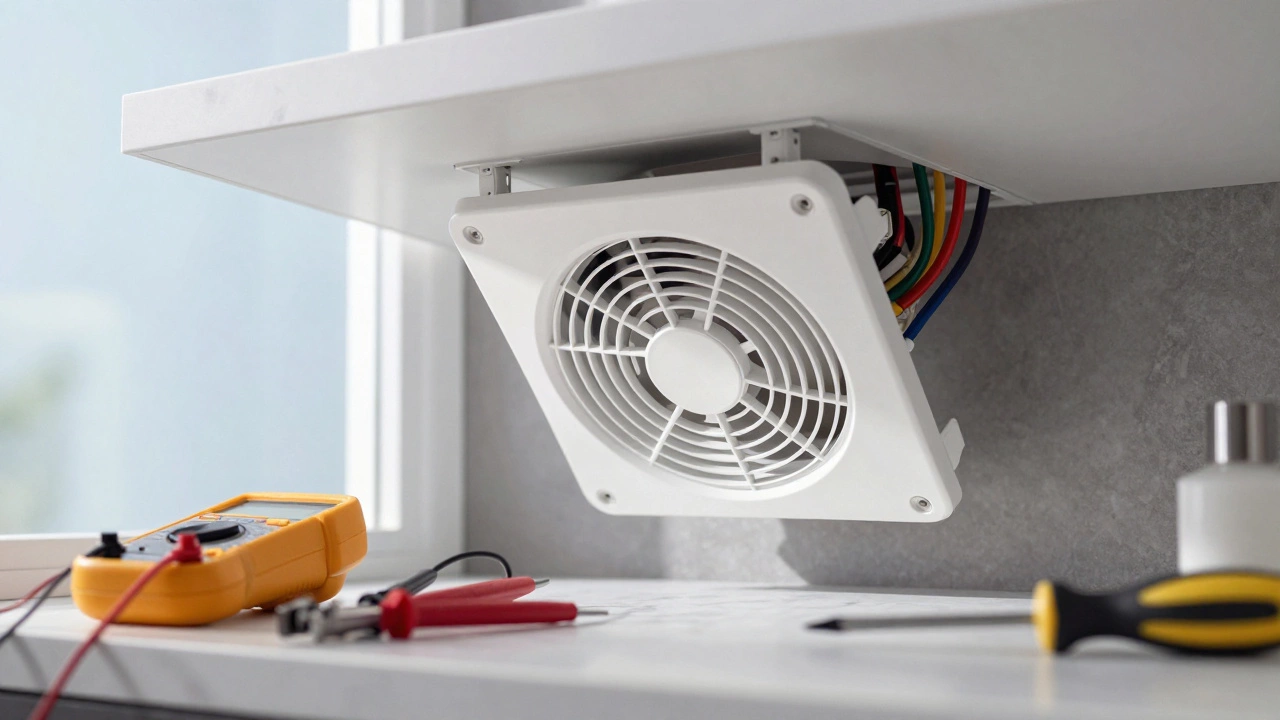
- Prepare the New Fan: Read the manufacturer’s instructions. Every brand is slightly different. Assemble the mounting frame if required. Cut the power cable to length if it’s too long, but leave enough slack to tuck back into the ceiling space.
- Connect the Wires:
- Live (Brown): Connect to the live terminal on the fan.
- Neutral (Blue): Connect to the neutral terminal.
- Earth (Green/Yellow): Connect to the earth terminal. This is crucial for safety.
- Use Wago connectors to join the wires from the ceiling to the fan. Push firmly until you hear a click.
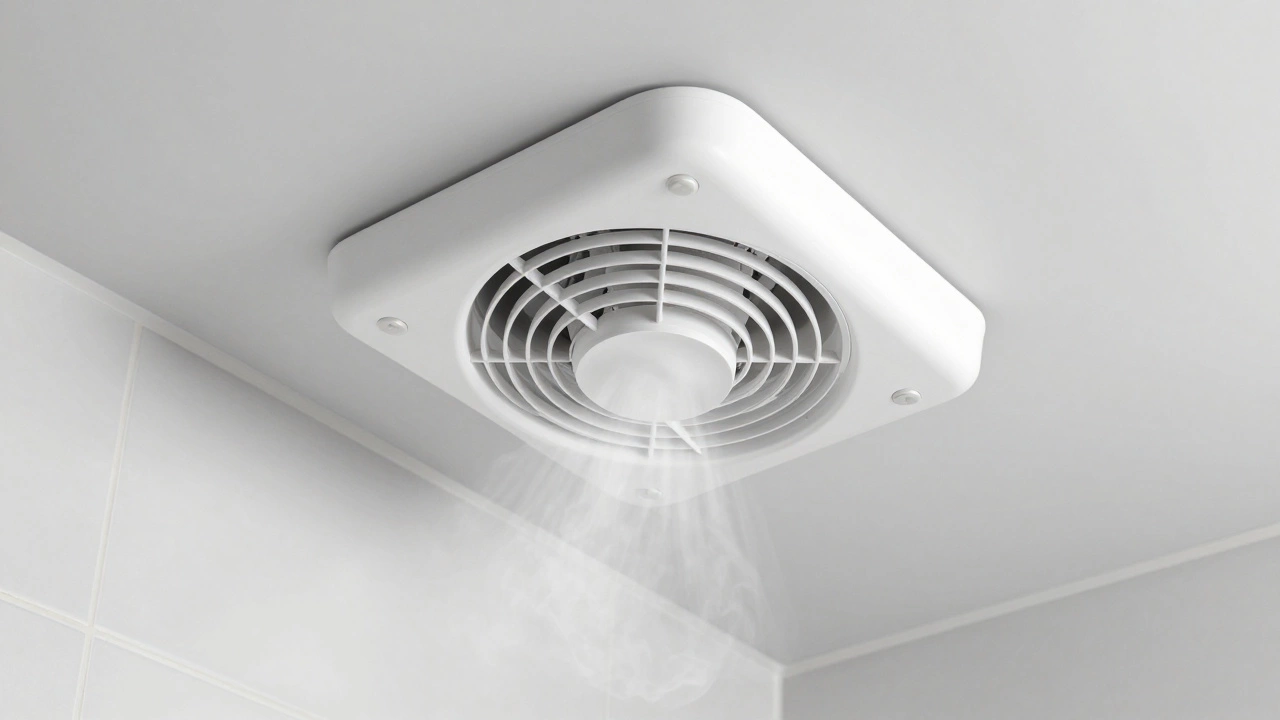
- Mount the Fan: Tuck the wires neatly back into the ceiling void. Align the fan with the mounting holes. Screw it into place. Make sure it sits flush against the ceiling. If it’s wobbly, the airflow will be noisy and inefficient.
- Attach the Grille: Snap or screw the front grille onto the fan body.
- Test Before Sealing: Turn the power back on at the fuse box. Switch on the fan. Listen for unusual noises. Does it vibrate excessively? Does it smell like burning plastic? If so, turn it off immediately. If it runs smoothly, proceed.
- Seal the Edges: Apply a bead of silicone sealant around the edge of the grille to prevent dust and insects from entering the gap between the fan and the ceiling.
Common Mistakes to Avoid
Even experienced DIYers make errors. Here are the most common pitfalls.
Ignoring the IP Rating: The Ingress Protection (IP) rating tells you how resistant the fan is to water and dust. In bathrooms, you must use a fan with at least an IP44 rating if it’s within 1 meter of a bath or shower. Using a lower-rated fan in a wet zone is a shock hazard. Check the label on the box.
Using Plastic Ducting: Flexible plastic ducting creates turbulence and noise. It also collects condensation and lint, reducing efficiency over time. If you can, use rigid PVC ducting or smooth-bore aluminium ducting. It’s quieter and lasts longer.
Blocking the External Vent: Ensure the external flap opens freely. Sometimes, insulation or drywall covers the vent opening during construction. If the air can’t escape, the fan works harder, wears out faster, and doesn’t remove moisture effectively.
Wrong Airflow Rate: Fans are measured in litres per second (l/s). A small ensuite might need 6 l/s, while a large family bathroom needs 15 l/s or more. Kitchen fans need even higher rates to handle cooking fumes. Buying an undersized fan means it won’t do its job. Oversizing it wastes energy and creates noise.

Legal and Regulatory Considerations in the UK
As mentioned earlier, Part F of the Building Regulations is key. Since 2022, stricter rules have been enforced regarding ventilation in new builds and major renovations. While replacing an existing fan usually doesn’t trigger a full building notice, you must ensure the replacement meets current performance standards.
If you are installing a fan for the first time in a room that previously had none, you may need to notify your local building control authority. Failure to comply can result in fines or difficulties when selling your home. Always check with your local council if you are unsure.
Additionally, under the Electricity at Work Regulations 1989, even domestic DIYers are expected to carry out electrical work safely. If you cause a fire due to poor wiring, your home insurance may refuse to pay out. It’s worth getting a minor electrical installation certificate (MEIC) from a qualified electrician after your DIY work, just to be safe.
Choosing the Right Fan Type
Not all fans are created equal. Here is a breakdown of types to help you choose.
| Type | Best For | Pros | Cons |
|---|---|---|---|
| Standard Pull-Cord | Budget installs, simple replacements | Cheap, easy to install | No automatic operation, manual effort required |
| Humidity Sensor | Bathrooms with showers | Automatically turns on when steam is detected | Slightly more expensive, sensor needs cleaning |
| Timer Delay | Kitchens and bathrooms | Runs for a set time after switching off to clear residual moisture | Requires constant power supply (live wire) |
| Heat & Humidity | High-end bathrooms | Combines both sensors for optimal performance | Higher cost, complex wiring |
For kitchens, look for fans with grease filters. These trap oil particles and prevent them from clogging the motor. Without filters, kitchen fans fail much faster than bathroom fans.
Troubleshooting Your New Installation
After installation, if something feels off, here is how to diagnose it.
Fan Won’t Start: Check the breaker again. Did you accidentally trip it? Check the connections in the Wago terminals. Are they tight? Test the light bulb if it’s a combined light/fan unit.
Fan is Noisy: Is it rattling? The grille might not be screwed down tightly. Is it whistling? There might be a leak in the ducting. Seal all joints with foil tape. Is it humming? The motor bearings might be defective. Return the unit.
Poor Suction: Is the external vent blocked? Open the window and feel for air coming out of the vent. If not, trace the ducting for kinks or obstructions. Also, check if the fan is sized correctly for the room volume.
Do I need a permit to install an extractor fan?
In most cases, replacing an existing fan does not require a permit. However, if you are installing a new fan where none existed before, or modifying the structure of your home (like drilling through load-bearing walls), you may need to notify your local building control office. Always check local regulations.
How loud is a typical extractor fan?
A standard bathroom fan operates between 20 and 30 decibels (dB), which is similar to a whisper. High-performance kitchen fans can reach 60 dB or more. Look for models with sound insulation or "quiet" labels if noise is a concern.
Can I install an extractor fan in a listed building?
Listed buildings have strict conservation rules. Drilling holes in exterior walls or altering historic features usually requires Listed Building Consent from your local planning authority. Do not proceed without permission.
What is the difference between a push-pull fan and a standard fan?
A push-pull fan actively draws fresh air in while extracting stale air, creating a continuous flow. Standard fans only extract air, relying on passive vents elsewhere to bring fresh air in. Push-pull fans are more efficient but require more complex ducting.
How often should I clean my extractor fan?
Clean the grille and filter every 3-6 months. The internal blades should be checked annually. Grease filters in kitchen fans need washing or replacing more frequently, depending on usage.
Installing an extractor fan is a rewarding DIY project if you respect the risks and follow the steps. It improves your home’s comfort, health, and value. But remember, if you feel unsure at any point, calling a professional is not a sign of weakness-it’s a smart investment in safety.