- 16 Jul 2026
- Gideon Thornton
- 0
Kitchen Extractor Fan Sizing Calculator
Calculate the required airflow (m³/h) for your kitchen extractor fan based on UK building regulation guidelines. The general rule is to change the air in your kitchen 10 times per hour.
Staring at a noisy, rattling, or completely dead kitchen extractor fan is one of those household annoyances that makes you question your life choices. You just want to cook without the sound of a jet engine taking off in your ceiling. The immediate thought pops into your head: "Can I fix this myself, or do I need to call a pro?" The short answer is yes, you can replace a kitchen extractor fan yourself, but there are some serious caveats involving electricity and building regulations that you cannot ignore.
In the UK, where safety standards are strict, replacing a fan isn't just about unscrewing the old unit and bolting on a new one. It involves dealing with live wires, potentially cutting through plasterboard, and ensuring your home meets current building regulations. If you get it wrong, you risk electric shock, fire hazards, or failing a future property survey. This guide will walk you through exactly what you need to know before you pick up a screwdriver.
Assessing Your Skill Level and the Job Complexity
Before you buy a new fan, you need to be honest about your DIY capabilities. Replacing an extractor fan falls into two categories: like-for-like replacement and upgrading/changing type. A like-for-like swap-where the new fan fits the exact same hole and connects to the same power source-is relatively straightforward for anyone comfortable with basic tools. However, if you are changing from a ducted fan to a recirculating one, or moving the location of the fan, the complexity skyrockets.
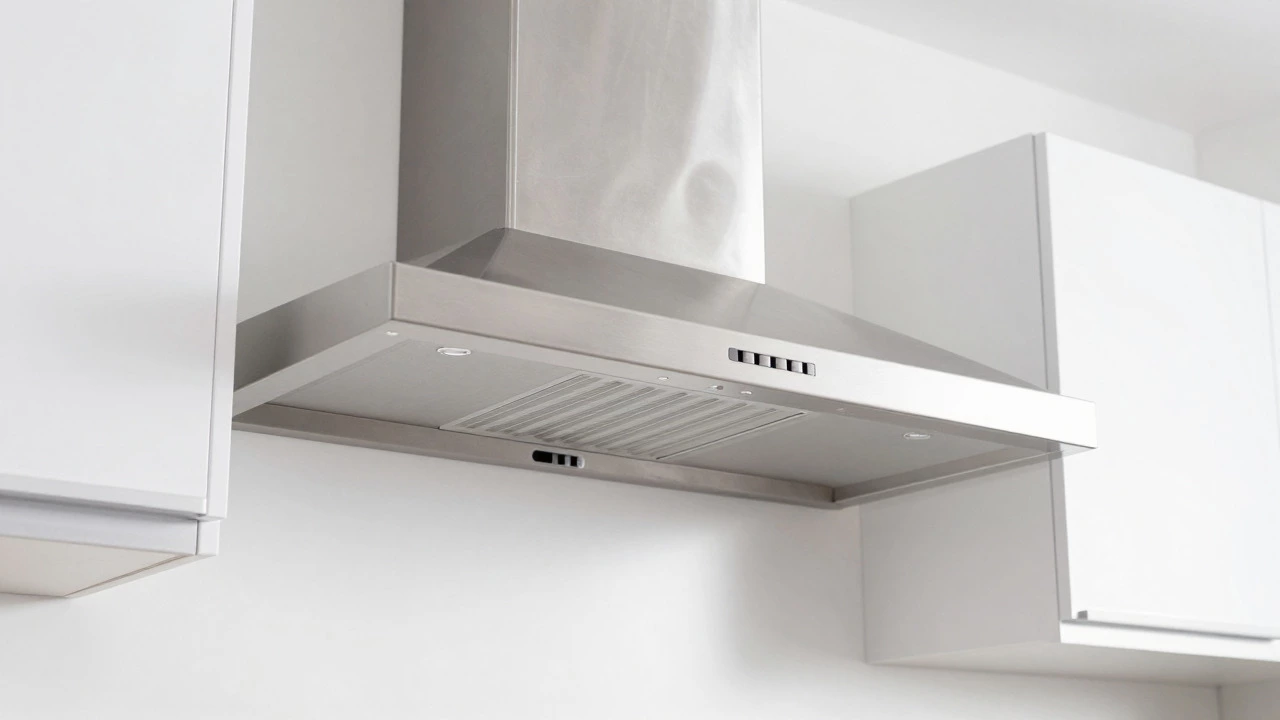
You also need to check the type of fan you have. Most kitchens use either a canopy hood (mounted under cabinets), an inline fan (hidden in the loft or wall cavity), or a window-mounted unit. Canopy hoods are the easiest to access because they hang down. Inline fans often require removing ceiling tiles or opening up walls, which adds drywall repair to your to-do list. Window units are simple but depend heavily on the size of your existing frame.
Is replacing an extractor fan dangerous?
Yes, primarily due to electrical risks. You are working with 230V mains electricity. If you do not isolate the power correctly, you risk severe electric shock. Additionally, improper installation can lead to poor ventilation, causing moisture buildup and mold growth in your kitchen.
Understanding UK Building Regulations and Electrical Safety
This is the most critical part of the process. In England and Wales, installing or replacing electrical appliances is governed by Part P of the Building Regulations. For most homeowners, replacing an existing fan with a similar model in the same location is considered "minor work" and does not require notification to the local authority building control. However, this exemption has limits.
If you are adding a new circuit, working in a special location like a bathroom or shower room (though less relevant for kitchens), or creating a new outlet, you must notify building control. Even if you don't need to notify them, the work must still comply with the regulations. This means using correct cable types, ensuring proper earthing, and securing connections safely. Many landlords and home sellers now require an Electrical Installation Certificate or a Minor Works Certificate for any electrical changes. Without this paperwork, you could face issues when selling your home.
If you are unsure about your electrical skills, hire a qualified electrician. They will provide the necessary certification, giving you peace of mind and protecting your home insurance policy. Remember, many insurance policies void coverage if unqualified persons perform electrical work that leads to damage or injury.
Gathering the Right Tools and Materials
Don't start until you have everything ready. Rushing out to the hardware store mid-installation is frustrating and increases the chance of making mistakes. Here is a checklist of what you will likely need:
- New Extractor Fan: Ensure it matches the airflow requirements of your kitchen (measured in cubic meters per hour, m³/h).
- Screwdrivers (Phillips and flathead)
- Wire strippers and crimpers
- Electrical tape and wire connectors (Wago connectors are highly recommended for safety and ease of use)
- A multimeter to test for live voltage
- Insulated gloves
- Drill and appropriate bits (if mounting holes need adjustment)
- Ducting material (if replacing flexible hose with rigid ducting)
- Silicone sealant
Choosing the right fan is crucial. Look for the Energy Rating and noise level (decibels). A fan rated at 65dB will be noticeably quieter than one at 75dB. Also, check the motor type; brushless DC motors are more efficient and last longer than traditional AC motors, though they cost more upfront.
Step-by-Step Replacement Process
Follow these steps carefully. If anything feels unsafe, stop and call a professional.
- Turn Off the Power: Go to your consumer unit (fuse box) and switch off the breaker for the kitchen circuit. Use your multimeter to confirm there is no voltage at the fan's connection point. Never rely solely on the light switch.
- Remove the Old Fan: Unscrew the canopy or housing. Carefully lower the unit. Take photos of the wiring configuration before disconnecting anything. This helps when reconnecting the new unit.
- Disconnect Wiring: Identify the live (brown), neutral (blue), and earth (green/yellow) wires. Disconnect them using the appropriate method. If the old fan uses screw terminals, loosen the screws. If it uses push-fit connectors, press the release tab.
- Prepare the New Fan: Check the new fan's instructions. Some models require specific mounting brackets. If the new fan is larger, you may need to cut the existing hole in the cabinet or ceiling. Measure twice, cut once.
- Connect the Wires: Connect the brown wire to live, blue to neutral, and green/yellow to earth. Use Wago connectors for a secure, insulated joint. Ensure no bare copper is exposed outside the connector.
- Install Ducting: If replacing the exhaust pipe, remove the old flexible ducting. Rigid aluminum ducting is better as it reduces air resistance and noise. Seal all joints with foil tape, not standard duct tape, which degrades over time.
- Mount the Fan: Secure the fan in place according to the manufacturer's instructions. Ensure it is level and firmly attached.
- Test Before Finalizing: Turn the power back on at the consumer unit. Test the fan speeds and lights. Listen for unusual noises. If it works smoothly, turn the power off again and complete any final cosmetic fixes.
Common Pitfalls to Avoid
Even experienced DIYers make mistakes here. One common error is ignoring the airflow rating. If your new fan is too weak, grease and steam will build up in your kitchen, leading to mold and unpleasant odors. As a rule of thumb, your fan should change the air in your kitchen 10 times per hour. Calculate your kitchen volume (length x width x height) and multiply by 10 to find the required m³/h.
Another mistake is poor ducting. Long runs of flexible ducting create turbulence and reduce efficiency. Keep ducts as short and straight as possible. Avoid sharp bends. If you must turn, use gradual elbows. Also, ensure the external vent has a bird guard and rain cap to prevent pests and water ingress.
Finally, don't forget maintenance. Even the best fan fails if it's clogged with grease. Clean the filters every month. If you skip this, the motor works harder, wears out faster, and becomes noisier. Consider buying a fan with washable metal filters rather than disposable carbon filters for long-term savings.
When to Call a Professional
While DIY is rewarding, some situations demand expert help. If your kitchen lacks a dedicated circuit for the extractor fan, you need an electrician to run a new wire from the consumer unit. If you are installing a fan in a listed building or conservation area, you may need planning permission for external vents. If the existing wiring looks damaged, corroded, or outdated (e.g., rubber-insulated cables), do not touch it. Hire an electrician to assess and upgrade the wiring first.
Also, consider calling a pro if you are uncomfortable working at heights or handling heavy canopy units alone. Safety is paramount. A few hundred pounds spent on a professional installation is cheaper than medical bills or major repairs caused by incorrect wiring.
Conclusion: Empowering Your Kitchen Upgrade
Replacing a kitchen extractor fan is a manageable DIY project for those with basic electrical knowledge and the right tools. By understanding building regulations, choosing the correct fan specifications, and following safety protocols, you can improve your kitchen's air quality and reduce noise significantly. Always prioritize safety over speed. If in doubt, seek professional advice. A well-installed extractor fan enhances cooking comfort and protects your home from moisture damage, making it a worthwhile investment.
Do I need a permit to replace my kitchen extractor fan?
In most cases, no. Replacing an existing fan with a similar model in the same location is considered minor electrical work and does not require notification to building control in England and Wales. However, if you are adding a new circuit or changing the location significantly, you may need to comply with Part P regulations and potentially notify authorities.
How much does it cost to replace a kitchen extractor fan?
The cost varies widely. A basic DIY fan costs between £50 and £150. Professional installation adds £100 to £200 for labor. High-end models with advanced features can cost over £300. Total costs typically range from £150 to £500 depending on the fan type and installation complexity.
What size extractor fan do I need for my kitchen?
Calculate your kitchen's volume in cubic meters (m³) and multiply by 10. For example, a 20m³ kitchen needs a fan with at least 200 m³/h airflow. Add extra capacity if you have a high-output cooker or open-plan living space.
Can I install a recirculating fan instead of a ducted one?
Yes, but only if external ducting is impossible. Recirculating fans filter grease and odors using charcoal filters but do not remove heat or moisture. They are less effective than ducted fans and require regular filter replacements.
How often should I clean my extractor fan filters?
Clean metal grease filters every 4-8 weeks, depending on usage. Charcoal filters in recirculating models should be replaced every 3-6 months. Regular cleaning maintains airflow efficiency and extends the motor's lifespan.